Monday, January 31, 2011

Different Ways of Wearing a Sari

Different Ways to Drape a Sari
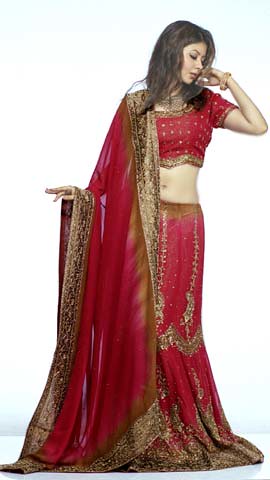
SIX YARDS of sheer grace and elegance is what the sari is all about. A Sari is one of the most elegant attires a woman can adorn. It is essentially an un-stitched long piece of fabric which needs to be draped in a particular way to achieve the fully dressed effect. Draping a sari is an art. The saree is worn in in different ways in different states of India. However, the most common method is wrapping the cloth around the waist, making pleats in the front and draping the final length around the shoulder. The remaining fabric that is draped over her blouse and shoulder, falling behind her is called the pallu.

Before you Start

Two essential parts of attire, that go along with the Saree, need to be chosen carefully to compliment the Saree. These are:


A petticoat which is a waist-to-floor garment, tied tightly at the waist by a drawstring. The petticoat color should match the base sari color as closely as possible. No part of the petticoat, of course, is visible outside the Saree, after having worn it.

A blouse which needs to be tight-fitting and whose color needs to be chosen keeping the look of the saree in mind, can be short sleeved or sleeveless, with a variety of necklines. The blouse ends just below the bust.

Wearing a Sari the Traditional Way

* Step 1. Around your body. Starting at the navel, tuck the plain end of the saree into the petticoat and continue tucking till you take a complete turn from right to left. Adjust the lower end of the saree to the height required. Ideally wear your footwear so that you drape the saree to the right length.

* Step 2. Measuring the pallu. Hold the top edge of the saree where the pallu is and bring it around your hips to the front and over your left shoulder, thus measuring the length of the pallav or pallu. The pallav should hang down the back to the knee. You may pin your pallu to your sari blouse provisionally.

* Step 3. Making pleats. Create pleats with the saree. Make about 7 to 10 pleats and hold them up together so that they fall straight and even. Tuck the pleats into the waist petticoat slightly to the left of the navel, taking care to see that the pleats are turned towards the left.

* Step 4. The pallu. The remaining portion of the saree must be turned once around the body and then draped over the left shoulder. Arrange the pleats on this part of the saree and then pin them up on the left shoulder to prevent the pallu from falling off.

This is the most common method to wear a saree. With matching bindi and jewellery you feel like a complete Indian woman.

Different Ways of Wearing a Sari

Different regions of India have their own distinct forms of draping a Saree. Some of these are outlined below:

Gujarati way: This version of draping, ccommonly known as the seedha pallu way, is also found in parts of Uttar Pradesh, Madhya Pradesh, Rajasthan and Bihar. Instead of opening to the left, the pleats are tucked so that they open to the right. Then, the pallu is taken to the back and brought over the right shoulder. It is then spread across the chest, and the left edge is tucked in the petticoat at the back.

Maharashtra method: Instead of the usual five-and-a-half meters, the sari in this version measures eight meters. One portion of the sari is drawn up between the legs and tucked in behind at the waist, while another portion is draped as a pallu over the bosom. Thus it forms a kind of divided sari, allowing greater freedom of movement.

Tamilian version: Like the Maharashtra version, the sare in this version, too, measures eight meters. After wrapping around the waist, the pleats are positioned along the left leg. The rest of the sari is taken over the left shoulder, wrapped once again round the waist and tucked on the left side.

Bengali style: The saree is worn pleatless; it is wrapped around the waist, brought back to the right side and the pallu is thrown over the left shoulder. The pallu is then brought up under the right arm and once again cast over the left shoulder.

Sunday, January 30, 2011

Wedding Makeup and Skin Care Regime

Creating a Flawless Face for Your Wedding Photos


Every bride seeks to look her best on her wedding. Great wedding makeup starts with a great canvas. Learn how to put your best face forward on your wedding day.

People who wear makeup often seek to enhance one feature, like their eyes or their lips. In order to best play up that feature, however, the skin needs to be in its best form. This means proper skin care, makeup preparation, and finding the perfect foundation match.
Skin

If you don't have a regular skin-care routine, start one three to five months before the wedding. This will give your skin time to adjust. Skin care doesn't have to be expensive or confusing. Use a basic cleanser, such as Cetaphil, morning and night. Exfoliate once or twice per week, and use a moisturizer twice per day. Lip balm is also a good idea to keep lips hydrated and soft.

Seeing an esthetician at a salon or spa is also a great way to begin a personalized skin care routine. While it would be ideal to start getting facials 4-6 months before the wedding, you can start as late as three months. Do note, however, that you should not get a facial within two weeks of your wedding, so schedule accordingly.
Indian Wedding Dresses Find more sources/options for Indian Wedding Dresses www.webcrawler.com
NYC Makeup Artist Film/HD/Video/Print/Commercial Theatrical. Online portfolio. www.verastromsted.com
Ads by Google

Avoid the tanning bed. Not only is tanning bad for the health of your skin, brides who are normally light to moderate in color end up looking unnatural in their wedding photos years later. If you truly feel you need a touch of color for your wedding day, opt for a sunless tanner or spray on tan instead. They have developed significantly over the years and options for fair skin and dark skin are all available without the worry of turning bright orange.

Sunless tanning products are safe for your skin, temporary, and achieve the same results without the damaging effects of the sun. Your first coat of sunless tanner should be applied five days prior to the wedding, and if you desire a darker color, apply another coat three days prior to the big day.
Foundation

On an everyday basis, a foundation with SPF is recommended, but on your wedding day, you should use a foundation that does notcontain any sort of sunscreen ingredient. The ingredients that act as sunscreen will reflect the photographer's flash, making your face look brighter than the rest of your body. The reflection also washes out your features. During formal portraits, the photographer can "bounce" the light, which neutralizes the SPF brightness, but candid shots, photos during the ceremony, and the reception are usually not staged, and therefore it is best to eliminate SPF in your foundation altogether.

Using a foundation primer after moisturizing and before your foundation will significantly increase the length of time between powder touch-ups. Additionally, foundation primers even out the skin tone and texture of the skin, and absorb oil, to keep shininess at bay.

Make sure that the foundation you select matches your skin tone perfectly. Choosing the right foundation texture is equally as important. The right texture will ensure that your makeup lasts throughout the day and into the evening.

Use concealor sparingly and just where needed. With concealor, less is more. Learn more about how to hide dark under eye circles my emailing us.


Saturday, January 29, 2011

Makeup For Your Eyes on your Wedding Day

Bridal Eye Makeup Tips and Tricks

They say that they eyes are the windows to the soul. Make your eyes pop on your wedding day by following these makeup tips.

When it comes to wedding eye makeup, there are several things to keep in mind. Often, the less you do to your eyes will enhance them more. Eye makeup that is classic and timeless will look wonderful in photos for years to come, whereas trendy looks will appear dated and overdone. The following tips will help you figure out what is best for your wedding day.

Brows

Eyebrows are often overlooked when it comes to makeup. Yet they frame the face, create depth and add shape. If you have never seen an esthetician or waxing specialist to shape and groom your eyebrows, consider booking an appointment 8 weeks from your wedding day. This will give you a chance to see how you react to waxing, threading, or tweezing, as well as give you some time to adjust to seeing the shape. Your esthetician will tell you when you should come back again before the wedding, but generally you should get your brows waxed a week prior to the wedding. This allows for any redness to disappear completely.

To further enhance your eyes on your wedding day, consider filling in your eyebrows with a soft powder to complete your look. A neat and tidy eyebrow will only enhance any eye makeup you choose to use.

Eye Shadow That Lasts All Day

Before applying eyeshadow, use an eyeshadow primer, such as MAC Paint. Primers are designed to help the powdery texture of eyeshadow adhere to the eyelid better. This increases the longevity of your eyeshadow. Do not use a concealer in place of an eyeshadow primer. Concealers do not dry like primers, and actually make eyeshadow more susceptible to creasing, running, and smearing.

An alternative to using an eye shadow primer is to simply apply a layer of powder to the eyelid before apllying eye shadow. While this will help somewhat with controlling the creasing and oiliness on the eyelid, it is not as effective as using a primer designed for the eyes.

Choosing Eyeshadow and Eyeshadow Application

Avoid using eyeshadow with a lot of shimmer or glitter. Used sparingly, they can create a soft, beautiful look. However, in photographs, they can easily look like oily skin or greasy spots instead. Stick with semi-matte or matte eyeshadow shades, which photograph better than any other texture. Make sure you practice your makeup several times before the big day. Take a digital photo after each trial to objectively look at the end result.

When applying your wedding day makeup, apply your eye makeup first. It seems counterintuitive, but applying your eye makeup before anything else will save you time in the long run. When eyeshadow is applied, small particles often fall onto the cheek, and brushing them away usually leaves a small streak of color. This means going back again and correcting your foundation and concealer. By applying your eye makeup first, you can wipe away any fallout without having to reapply your foundation and concealer again.

Mascara and Eyelash Options

For brides who are likely to cry, waterproof mascara is a strongly advised option. Alternatively, consider using a cream-based mascara, like Kiss Me Mascara. They are water-resistant and will not smudge, smear or flake.

Another option is to have your eyelashes tinted in a salon or spa. The results last two to three weeks, or longer, and give the same appearance as if you are wearing mascara. This is a great option for brides with blonde or ultra-light eyelashes.

False eyelashes are a popular option for brides. When choosing false eyelashes, choose a set that looks to be almost "not enough." Once applied, they will create a full, natural-looking lashline without being noticeably fake.

Remember, the key to DIY Wedding makeup success is practice and patience. Give yourself ample time to do your makeup. You can learn more about other areas of wedding makeup by shooting us an email.

Friday, January 28, 2011

Balancing Family Wedding Traditions - Who's Wedding is this anyhow?


Balancing family traditions with your own beliefs and values is a key issue new couples face when planning their wedding. Many of the traditions that will come up involve religion or cultural themes (where you marry, what you wear, readings), and you will need to address these complications ASAP.

Whose wedding is this, anyhow?

Traditionally, the parents of the bride pay for the wedding, while the groom’s parents cover the rehearsal dinner. Although these “rules” have changed significantly in the past 20 years, if any parent is contributing a significant chunk of money to your wedding, their input needs to be honored. If your mother is dead-set on you getting married in a church, and you and your fiancĂ© want a secular affair, your best bet is to compromise. Take Mom aside, and explain to her how much you want to honor her request, then see if, perhaps, you can have the ceremony in a church, followed by an outdoor reception with a rock band.

If your husband is firmly against the church idea for whatever reason (he’s Jewish, it goes against his own beliefs, personal reasons), you should still opt for a compromise. See if you can arrange for a priest to do a reading and blessing. If not, have your mother or another relative do a reading. Weddings, like life, are all about compromise. Some couples even have two weddings; an official, religious ceremony, with just close family and friends, followed by a secular affair with a larger guest list; as for who signs the marriage license, that’s up to you.

Taking advice to the limit.
Whenever you say “no” to a close relative, you risk repercussions. Your parents could withdraw their financial support, or, in extreme cases, refuse to attend the ceremony.  You need to be prepared to deal with both scenarios and weigh your options. If your 200-guest affair has been a life-long dream, and you can’t do it without parents’ help, bite the bullet and give in. If either set of parents are asking for something that morally goes against your values, then you need to tone down the wedding, and, in the most drastic cases, change the affair to a long-distance wedding so as to avoid any family conflict.

The last thing you want is strife before your big day, so always do your best to alleviate the issue beforehand. Whatever is requested from a parent or relative, take time to think it over and talk to your fiancĂ© about it, then ask for time alone with the person making the request. Take them out to lunch, or ask if you can drop by one afternoon when they’re alone (no e-mails or impersonal calls). Tell them how much you appreciate the gesture and that you love them, and then politely remind them that it’s your day and your decision to make. Hopefully, they will come around to the idea that they’re not the one in the spotlight.

Smaller requests are a bit easier to deal with. If Mom insists you wear her wedding dress, and you’ve already picked out your Vera Wang gown, offer to wear some jewelry of hers -- a bracelet or necklace or brooch. Should the request be in the form of a 12-piece band or a martini bar, and the two of you are paying for the wedding and on a limited budget, you have to explain the financial situation.

A word to the wise: Before you start major wedding planning, reach out to close family and friends, tell them how much you’re honored that they are taking part in this wondrous event, and ask them if they have any ideas they would like to incorporate into the wedding.  Even though you don’t have to say yes, they’ll be flattered that you sought their advice.

Bridal Makeup Tips

Bridal Makeup

You have met the man of your dreams, fallen in love with him and even got the marriage date fixed. And now, you are eagerly waiting for the day of your union, when the two of you would become each other's, forever. In the meantime, you have started with the preparations, right from choosing the venue to selecting the bridal dress. Now, have you given any thought to the D-day makeup as well? No? Then, waste no more time and start taking care of yourself from this moment onwards. We have listed a number of make up tips and ideas for the bride, in the following lines, just for you.

Makeup Ideas For Bride

Before The D-Day
  • Undertake a skin, hair and nail care program at least 6 weeks before the wedding. Start going for regular facials and manicures and ask your beautician to advise good beauty products as well.
  • Stay away from the sun as far as possible. In case you have to move out, do not forget to use a sun-block, with at least 20 SPF. Try to avoid extremes of weather, like wind, pounding rain or freezing cold, as well.
  • If you have a stressful job, make sure to go for relaxing massage, at least once in a week. Use essential oils in your bath and try to attend at least one aromatherapy session before the wedding.
  • Do not compromise on your sleep; otherwise you will be hard-pressed to hide your under-eye circles on the D-day. At the same time, be happy. Remember, what goes on in your mind reflects on your face as well. 
  • Make the booking for the make-up artists at least 3-4 months before the wedding. Let him/her see your outfit, so that he/she can plan the exact look. You should also go for a trial session before the wedding.
On The D-Day
  • It is always advisable to synchronize your makeup with the bridal outfit and jewelry. If they are extremely heavy, then you should prefer to get light makeup done on the D-day.
  • The time of your wedding also has a bearing on the type and amount of makeup. For instance, heavy makeup looks good at night, but will make you seem very odd under the harsh rays of the sun.
  • If your wedding has been scheduled for spring/summer, bright, pastel shades will work the best. For a winter wedding, warmer and deeper shades will be a better option.
  • Though your bridal makeup needs to be heavier and more dramatic than the one you do for usual parties, it should no be so heavy that it makes you look like a made-up doll. 
  • Since it is your wedding, you will be photographed a lot. Remember, foundations will yellow tones work best with flash photography. While, the ones with pink tones will make you look too pale.
  • Always go for a lip-liner that is the same shade as your lipstick. Otherwise, you might end up with a lip-line that is too noticeable. At the same time, always stick to long-lasting lipsticks, for your wedding.
  • Remember, you have to balance the eye makeup with lip makeup. In case you want to go for dramatic eyes, go for a light-color lip shade. If you are using a dark lipstick, it is better to have natural, light eyes. 
  • Never ever forget to apply the foundation on your neck, back, ears and other exposed areas of the body as well. Otherwise, your face will look painted on and your beauty - artificial. 
  • It is advisable to go for a light dusting of translucent powder, so that your face does not end up shining too much. You can also apply bronzing powder to warm your skin tone and get a natural glow. 
  • Ask your sister, friend or some other female relative to carry a powder compact, tissues and lipstick for you. This will help you do the touch ups, especially if your wedding is going to be a long affair.

Thursday, January 27, 2011

Buddhist Wedding Traditions and Rituals


A Buddhist wedding is typically a simple, yet meaningful, occasion. The civil ceremony takes place in a back yard or home, and afterwards, couples usually go to a temple to receive special blessings from a monk. This also involves a time of prayer and giving gifts to the monk, such as food, medicine, flowers, and candles.

In Buddhist wedding traditions, the bride and groom wear embroidered mediation robes (the exact type of robe depends on the country where the wedding takes place). In the western world, couples might not even wear a robe. Wedding guests should wear something that is in good taste. If you are a guest at a Buddhist wedding, remember that you will need to remove your shoes before entering the temple.

Buddhist wedding ceremony vows typically go something like this: “Towards my wife I undertake to love and respect her, be kind and considerate, be faithful, delegate domestic management, present gifts to please her.” The bride says: “Towards my husband I undertake to perform my household duties efficiently, be hospitable to my in-laws and friends of my husband, be faithful, protect and invest our earnings, discharge my responsibilities lovingly and fastidiously.”

At an Indian Buddhist wedding, the food is almost always vegan or vegetarian. Western Buddhist weddings do not necessarily adhere to this practice, and meat can be consumed.

Indian Wedding Makeup Do's and Don'ts

Brides to be … it is your wedding day and please allow us to congratulate you.  As you are probably aware, wedding planning is a fantastically challenging process and there are times of utter confusion when making certain decisions. Bridal makeup and hair styling is definitely one of them!

While we know, you love to be in "the know" of the latest makeup trends (tutorials on blogs and video sites, always stopping by a makeup counter to try out a new launch), but you when it comes to your wedding day look what style do you go with???

While working with brides for over 20 years, one thing has always been consistent in my interaction with my North American & European brides. They want to look flawless and natural, but glamorous and not caked-up. Here are some guidelines on how to achieve this goal.


Do's

1. Do start looking for a professional artist at least 6 months before the big day, especially if your wedding is on a Saturday or a long weekend.

2. Do put aside a realistic budget for your beauty. There will be a higher price tag if you expect the artist to remain with you the entire wedding day. Try offering the artist more clients to work with at your wedding to make it worth their time commitment.

3. Do get comfortable with your artist's style. This includes reviewing their portfolio, considering recommendations from their previous clients, and a one-on-one consultation and trial makeup session.

4. Do set aside a budget for the trial sessions. Remember that the artist is investing time and talent to help finalize a look that looks exquisite on you.

5. Do have your outfit with you when you set up a trial session. A black T-shirt will not represent your wedding day outfit and therefore will not be able to fully translate the impact of the final look!

6. Do take your dupatta/chunni to your hair trial, especially if you need to have your head covered during the ceremony. Many a fabulous hair style succumbs to the weight of an embroidered chunni, so the hairstyle has to be pretty, as well as functional.

7. Do take pictures as reference, but remember that every look will have to be translated to reflect your features, hair, and skin tone. The Jodha Akbar look when replicated on you will be your version of it, not Aishwarya Rai's.

8. Do be open to your artist’s recommendations. They do this for a living and know how certain colors and intensities will turn out in pictures.  It is always best to take pictures before, then with an initial trial and then a stepped up style to see how the looks look on film.

9. Do try out different styles of eyelash enhancements - extensions, individual lashes or custom made full sets. They look spectacular and mascara is no match for what they can do for your eyes!

10. Do remember that colors look different in different lighting situations. If you get a trial session done for an evening event that is going to be in the soft mood lighting of a hotel, don't judge your makeup by looking at it in sunlight as it will look too bold.


Don'ts


1. Don't attempt to do your own hair and makeup. The bride has an enormous amount of nervous energy during those last few hours leading up to the wedding.


2. Don't ask a best friend or aunty to do it either. Yes, your friend does an amazing job with makeup when you go out to party, but can she make it work for different lighting situations and for professional photography? Does she have an array of professional grade tools and products on hand to do emergency fixes for stress related acne that just showed up or really dark circles that reflect the sleepless nights of the week preceding the wedding?


3. Don't try to cut corners on cost by going to a makeup counter to get a makeup for product purchase deal. Do you really want to run around the mall on your wedding day?


4. Don't show up at your consultation and trial session without taking care of grooming. Out of shape brows, facial hair and peeling skin will never let the flawless, perfect look come into play.


5. Don't opt for a trendy look for your wedding. If you must follow a trend, do so on the night of the sangeet. You really don't want to look time stamped on your wedding day.


6. Don't insist on dark eyes and nude lips for the wedding. Nude lips will not show up in the photographs and you will look washed out.


7. Don't go with an all out shimmery look to replicate the look you see on magazine cover shoots. It will make you look like a disco ball! Instead, keep the shimmer and sheen for your eyes with just a tad bit on your cheekbones.


8. Don't keep your hair all down for the garba and reception if you want to dance the night away (Although I did not follow this because my significant other wanted my hair down...he still owes me for this one ;) The energy, movement and passion of the moment will make you sweat and your hair will stick to your face and neck … not very pretty!


9. Don't believe everything you read about beauty products. Airbrush makeup does not last for over 18 hours and unless you use a perming chemical for curls, your curls will get looser, softer and more open as the hours progress.


10. Don't take too many suggestions from multiple friends and family after a trial session. Everyone has their own taste and viewpoint which may end up frustrating you. Let this be your decision and work with your artist until you discover the look you love!

Friday, January 21, 2011

Tips for a Winter Wedding Dress


Add fur or other wintery accessories to winter wedding dresses. Fur is elegant, charming, and perfect for the season! You might add a fur stole, a cozy cashmere wrap, or even a pair of long leather gloves accented with pearls. With these types of accessories, you get the beauty of both worlds. You can wear a sleeveless or strapless dress at the reception, and during other parts of the day (when you are arriving, outdoors taking photos, or during the ceremony), you can don your wintery accessories. You will evoke the image of a film star from the 1940’s. Hint: You could even add some fur or feathers to a vintage hairpin. Just make sure not to do overdo it; if you are already wearing a fur stole it is probably best to keep your hair accessories simple.

Experiment with blues, silvers, and grays. A light icy blue wedding gown is absolutely stunning. You could also wear an ivory dress (whichever shade suits your skin tone best) and accentuate your waistline with a charcoal grey sash.

Fabrics for winter wedding dresses. Winter is the season for heavier fabrics, such as silks, satins, and thicker laces (like Battenberg), and your dress could be embellished with pearls, other beads, crystals, and sequins. Dresses with sleeves are also making a comeback (take a look at Grace Kelly’s 1956 wedding gown).

Tuesday, January 18, 2011

Indian Wedding Accessories

Ethnically Accessorized
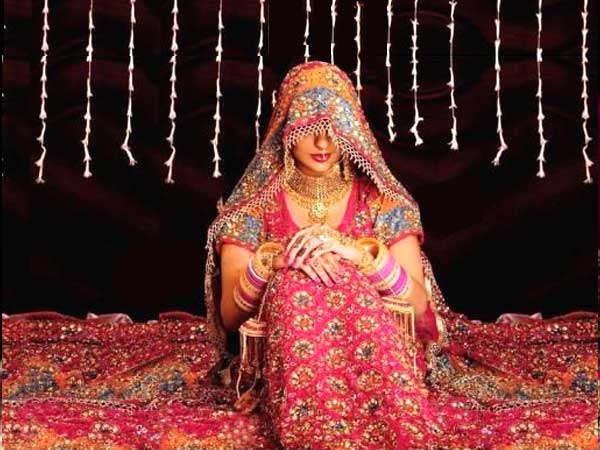
Accessories complement and complete any look. Ethnic Indian accessories that form a significant component of Indian fashion and include bindis, jute bags, bangles, anklets, toe rings and armlets. Accessorizing imparts a whole new flavor to traditional fashion, and in India these accessories carry a unique appeal and are gaining rapid popularity in the west as well.

Bindis

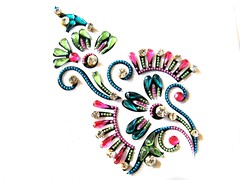
The stick-on bindis are small decorative motifs which are worn on the forehead, usually with traditional Indian attires. These come in various designs and colors some with stones studded into them. The patterns could include sun, moon, star, lotus, peacock, conch, shell, leaf, snake, paisley, swastika and geometrical designs. Another form of bindi includes tikkas and itlaks worn by both men and women. Bindis are available in liquid form, cream base or as stick-ons.
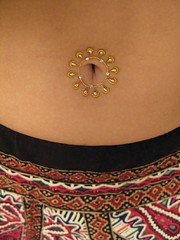
The Stick on bindis can be used in different ways other than the traditional way of sticking it on the forehead. They can be arranged to form various patterns to adorn any part to the body as temporary stick-on tattoos.
Bangles

Bangles are a common accessory while wearing tradition Indian attire. Adorning bangles in arms has been an Indian tradition since time immemorial. Bangles enhance the overall grace and beauty of the Indian woman as well as perfectly complement Indian ethnic or casual Indian wear.Bangles are solid in form and usually not flexible as in the case of bracelets. Bangles made of glass in different colors are the most popular type of bangles. The word bangle is originally derived from the Hindi word "bungri". Bangles form the most essential part of traditional Indian jewellery, and are usually worn in pairs on one or both wrists. Besides glass, bangles are also made of numerious precious as well non-precious materials like gold, silver, steel, platinum, wood, ferrous, metal, plastic etc. The designs vary from plain or simple to intricately ornate patterns studded with precious or semi-precious gems or stones like diamonds, pearls or other gems.

Needless to say that bangles can be used to accessorize western outfits as well.

Indian Bags

Jute is a plant fiber used in making ropes and sacks. However, recognizing the importance of this invaluable fiber, it is commonly termed as the "golden fiber" as it finds its application in the manufacture of many useful products. Therefore, it has deftly slipped into fashion circuit. Jute bags available in myriad colors, designs, shapes, sizes and patterns; are a roaring success in the international fashion circuit as well.

Other ethnic Indian bags are made from cloth, silk or brocade and embellished with bead work, mirror work, gota or intricate and ornate embroidery to enhance its traditional appeal.

Shawls & Stoles

Shawls and Stoles in various materials, colors and patterns are making a huge statement in the fashion industry worldwide. Indian cashmere and pashmina shawls are sought after everywhere. These shawls and stoles can be found with traditional Indian embroidery patterns like the paisley, elephants, peacocks and so on.

In India, the most famous shawls are the Kashmir shawls and are highly popular in the western countries as well. The most noteworthy characteristic of the Kashmiri shawl is its elaborate design pattern, of which the "cone" pattern is the most prominent. It is a perfect integration of balance, rich color tones and contrasts, brilliance and depth. These characteristics are basically attributed to "pashmina", which is a fine, soft, short, flossy quality of wool found on the shawl-goat, a variety of Capra hircus inhabiting the elevated regions of Tibet.

Indian Footwear

The traditional footwear essentially comprises of Mojaris, Punjabi Juttis, Kolhapuris, Leather Shoes, Handmade shoes and beaded shoes. All these essentially complement Indian ethnic or Indian casual wear perfectly. These are available for both males and females usually in varied colors and sizes.
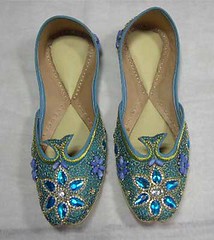
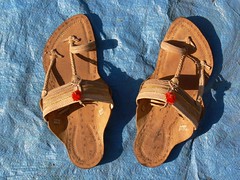
Similar to ballet flats, Juttis and Mojaris are basically royal Indian footwear which goes perfectly with traditional Indian clothing like churidar, sherwani, salwar suit or even sari. Most of these are cleverly handcrafted and ornately designed with colored threads, beads, fabrics and the like. The Juttis find their genesis in the state of Punjab, India and are very similar to mojaris. They are usually made of fine leather and skillfully handcrafted with embroidered threads and/or beads. Juttis and Mojaris are slip-on in style wherein the upper shoe is embroidered and covers the back of the feet till the Achilles tendon. However, different designs and styles have evolved while perfectly retaining its regal flavor. Most of the juttis are flat; however heeled versions are also available.

Kolhapuri slippers are also skillfully handcrafted into beautiful intricate patterns. These are made of fine quality leather usually obtained from the hides of bulls, cows and goats. Depicting the rich ethnic Indian tradition, this footwear has amassed great popularity in India as well as internationally. This is primarily because they feature a distinct uniqueness in terms of style and elegance; it can be worn by both genders and is available for all age groups.

Sunday, January 16, 2011

A Glossary to Traditional Indian Attire

Indian Traditional Wear: A Glossary to Indian Attire
A major part of any country's culture and people are the clothes they wear. Better known as the 'Traditional Costume or Attire' of a country,in different cultures, what a person wears is often indicative of his to her personal and social identity, marital status, occupation and sometimes-even religion.

Though following these traditions and wearing traditional clothes is slowly reducing in most countries where westernization is coming more into play, costumes and traditional wear will always have an important part, on the most important days...like festivals, weddings and important events and functions.

It maybe not be practical to wear on a daily basis in this day and age but sure enough is part of our culture and nationality which defines us as a race.

Traditional Indian Costumes

India being so diverse culturally and geographically, almost every region and state in Indian has their own attire.

Some similarities and common factors can be found in these costumes for instance the Sari/Saree can be called the Traditional attire of Indian Women, but the sari is worn differently in different parts of the country.

The traditional attire for Indian Men could be said to be the Kurta-pajama which is a loose fitting long pull over shirt with drawstring pants called the pajama, aptly named because of its simplicity and cos it's very comfortable to wear.

There is one thing to be said about Indian attire as a whole- We're not afraid to wear color! Every region's ethnic wear is vibrant to say the least. Even in day to day life color plays an important part in an Indian's wardrobe. Attire like the Sari or the salwar-kameez allows you to experiment with any color, and it's not only restricted to the womens wear...men's wear including the kurta-pajama or sherwani and even lungi's in the south are worn in every color under the sun.

As every region has its own traditional attire lets take a look at some of this traditional wear region-wise:

Women's Wear

Sari/Saree

The Sari is probably the best known item of Indian clothing, it is instantly recognizable and all who see it instantly associate it with India. It is essentially an un-stitched long piece of fabric which needs to be draped in a particular way to achieve the fully dressed effect. The Sari is said to be one of the oldest forms of clothing in India. The saree is worn in in different ways in different states of India. However, the most common method is wrapping the cloth around the waist, making pleats in the front and draping the final length around the shoulder. The Sari is considered formal attire in India.
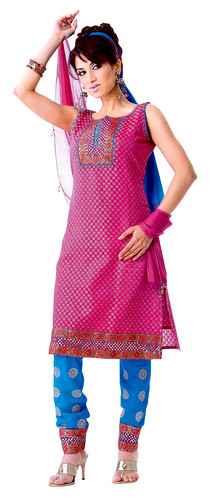
SIX YARDS of sheer grace and elegance is what the sari is all about!

Salwar-Kameez

The Salwar Kameez is probably the most popular of all the Indian clothes. Originally from the Punjab and Kashmir, it is now worn throughout India and by most Indian women living abroad. It’s popularity is due to the fact that is is comfortable, practical, modest yet incredibly elegant and stylish, so much so that it is even becoming popular amongst Western women. Sari's are now reserved more for formal functions and occasions. In the North Punjabi girls and women wear salwar kameez`s with bright colored duppattas.

The salwar kameez can come in a variety of fabrics, lengths and cuts but it will always consist of the same three things namely: the kameez (similar to the French word Chemise, French for shirt). This is the dress and can either be loose and flowing or more fitted at the waist with an a-line skirt. It more often than not has slits up the sides which can range from knee length to up to the thigh.The second piece is the salwar, which are the pants or bottom piece. The salwar can be described as huge baggy trousers, usually with a drawstring waist, a low crotch and heavily stitched, stiff cuffs. A version of the salwar kameez is also worn by men known as kurta-pajama.

A duppatta which is a piece of colorful cloth worn around the neck is similar to a stole or scarf and it completes the ensemble.

There are tons of different styles of salwar kameez which is used as a general term for the two piece attire. It's a very versatile clothing style as it can be mixed and matched around with different styles of bottoms or dupattas to change a look completely. The Cuts and fits are also changed to suit a persons body or preferences.


Another style of bottoms is the churidar similar to the Salwar but they are very tight fitting on the leg and incredibly long so that they bunch up around the ankles. These gathers at the ankles look like bangles (churis) and hence the name.

The kameez is sometimes called kurta and can be worn in various lengths and styles. A shrot version of a Kurta known as kurti is usually worn with jean or pants instead of traditional bottoms and is widely worn across the country today.

Lehenga or Ghagra Choli


A choli is a midriff-baring blouse worn in India and other countries where the sari is worn. The choli is cut to fit tightly to the body and has short sleeves with a low neck. The choli is usually cropped, allowing exposure of the navel; the cropped design is particularly well-suited for wear in the sultry South Asian summers. Choli's can be worn longer so they don't expose as much midriff as well.

Women of the Gujarat and Rajasthan countryside may also wear the choli with a gypsy skirt called a lehenga or a Ghagra. A Lehenga is a full skirt worn with a choli also called a gypsy skirt or lehnga. The lehenga is worn in different styles, made of different fabrics and includes unique patterns. The lehenga of Rajasthan and gujarat is known for its bandhni work which is a technique in tie-dye mastered by Hindu women of the region. The ensemble of this full skirt and choli is also called Ghagra Choli in some parts of India.

The more modern skirts of the Lehengas are cut on the bias and have a grand ball gown look to them, the more traditional kind are straight cut but still quite full. This outfit also includes a Dupatta or an odhani.

The states of Punjab and Haryana are famous for the `phulkari (flower-work) shawls that, worn with a tight-fitting choli and gaghra. Phulkari forms the traditional costume of rural women of this region. Phulkaris were made for everyday wear. Usually the border and field of the shawl were not so densely embroidered, with much of the ground cloth exposed. For ceremonial occasions, however, a special kind of phulkari known as a `bagh` (garden) was made, in which the whole of the ground was covered with embroidery, so that the base cloth was not visible at all. These Phulkaris are worn as the Dupatta or Odhani with Lehengas and Ghagra Cholis.

Men's Wear

Kurta-Pyjama/Churidar


Along the same lines as the Salwar-Kameez in women's wear is the men's Kurta Pyjama.

It consist of the same three things just cut differently and sometimes called different names. The Kurta is the top in the form of loose shirt falling either just above or somewhere below the knees of the wearer. It's a pull over type shirt with a few buttons. It has side slits or seems for easy movement. Kurtas are usually teamed with a salwar type bottom which is essentially the same as a womens salwar but cut slightly different. They are baggy drawstring pants that fall loosely and are loved for being comfortable and thats why their called pyjamas. A dupatta is also used to complete this look, but can be left out as well.


The kurta like the kameez can be worn or teamed up with different bottoms to create different ensembles. The Churidar is also worn by men with kurtas. They are the same as the women's churidars and gather at the ankles. Kurtas are also commonly pairs with jeans as well in more recent times.

Dhoti

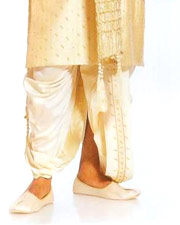
The 'pancha' in Telugu, called dhoti in Hindi, 'Laacha' in Punjabi, 'mundu' in Malayalam, 'dhuti' in Bangla, 'veshti' in Tamil, 'dhotar' in Marathi and 'panche' in Kannada, is the traditional garment of men's wear in India. It is a rectangular piece of unstitched cloth, usually around 5 yards long, wrapped about the waist and the legs, and knotted at the waist.

In northern India, the garment is worn with a Kurta on top, the combination known simply as "dhoti kurta", or a "dhuti panjabi" in the East. In southern India, it is worn with an angavastram (another unstitched cloth draped over the shoulders) in Tamil Nadu or else with a "chokka"(shirt) in Andhra Pradesh or "jubba" (a local version of kurta). The Dhoti kurta is considered formal wear in India.

Sherwani

Sherwani is a coat-like garment buttoned in the front, which reaches down to the knees, or lower. Usually has embroidery or some other type of work on it.A sherwani coat fits close to the body, fastened in the front with buttons, and extends to slightly below knee-length. Sherwanis are usually embroidered or detailed in some way. It's a formal version of a kurta and worn by boys and men at formal functions and occasions. A Sherwani is worn with chudidar bottoms or a dhoti style bottom and is completed with a dupatta and traditional Indian shoes called mojari's or juttis.

Lungi

The lungi is a type of wrap-around garment worn in many of the southern states of India. It's a rectangular piece of cloth little bigger than a towel and is wrapped around kind of like a sarong. In Kerala the lungi, locally known as Kaili or Kalli Mundu, is worn by both men and women. It is considered a casual dress or working dress of physical labourers. Lungis are generally colourful, and with varying designs. The plain white version of a lungi is known as a mundu. For more ceremonial occasions (like weddings), mundus often bear a golden embroidery known as kasavu.

Unlike dhotis, which are linear like sheets, lungis are sewn into a tube shape like a skirt. Depending on local tradition, lungis can be worn by men and/or women, are tied or fastened in various ways, and can be used in different cultural activities, ranging from normal daily life to elaborate wedding ceremonies. For daily purposes, a simple double knot is most popular, since it is least likely to slip or come undone. Another way of wearing is it by draping it around the waist and pleating it in the front at the groin.

Kerala men folk generally tuck up their mundus or lungis. The bottom of the garment is pulled up and tied back on to the waist. This would make the mundu or lungi only cover the body from the waist to the knees. In this fashion it somewhat resembles a kilt, but without pleats. The lungi is thought to be quite comfortable, as its length can be adjusted rather easily. It is particularly popular in regions where the heat and humidity create an unpleasant climate for trousers.

Saturday, January 15, 2011

Mehndi (Henna) Art

Mehndi (Henna) Art
Henna, also known as Heena, is a form of body art that has existed since ancient times. Mehndi (or Henna) is the application of henna as a temporary form of skin decoration, in countries like Egypt, Iran, Pakistan, Syria, Morocco, Yemen, and Somaliland. It is typically employed for special occasions, particularly weddings. It is usually drawn on the hands and feet, where the color will be darkest.
The patterns of mehndi are typically quite intricate and predominantly applied to brides before wedding ceremonies. However, Mehndi decorations became fashionable in the West in the late 1990s, where they are sometimes called "henna tattoos".


What is Henna?
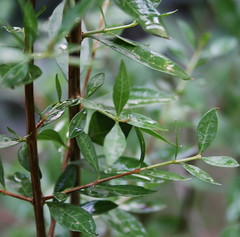
Henna is a flowering plant, the sole species in the genus Lawsonia in the family Lythraceae. It is native to tropical and subtropical regions of Africa, southern Asia, and northern Australasia in semi-arid zones. Henna is a tall shrub or small tree, 2–6 m high.

Henna, produces a red-orange dye molecule called lawsone. This molecule has an affinity for bonding with protein, and thus has been used to dye skin, hair, fingernails, leather, silk and wool. It is usually drawn on the hands and feet, where the color will be darkest because the skin contains higher levels of keratin which binds permanently to lawsone, the colorant of henna.
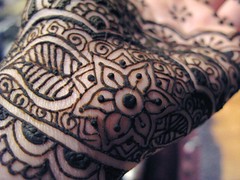
Mehndi (Henna) Art

Henna has been used to adorn young women’s bodies as part of social and holiday celebrations since the late Bronze Age in the eastern Mediterranean. Henna was regarded as having “Barakah”, blessings, and was applied for luck as well as joy and beauty. Brides typically had the most henna, and the most complex patterns, to support their greatest joy, and wishes for luck. Some bridal traditions were very complex, such as those in Yemen, where the Jewish bridal henna process took four or five days to complete, with multiple applications and resist work.
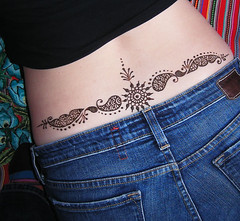
Henna paste is usually applied to the skin using a plastic cone or a paint brush, but sometimes a small metal-tipped jacquard bottle used for silk painting (a jac bottle) is used. The cone has a fine opening at the thin end which lets a thin flow of paste to facilitate intricate designing.

Why is Henna as Body Art Popular?

Henna painting has become very popular as a form of temporary tattoo and is liked by a lot. The best aspect of henna is that it is totally natural, made from a plant plant whose leaves are first dried and then crushed to make a fine powder. While applying, the powder is mixed with water. This makes henna totally safe to use. Along with that, its application is totally painless and the effect is temporary. You can use henna to get tattoos, without worrying about pain or infection. In case you are not satisfied with a particular tattoo, just wait for a few days. Its color will soon wash off and you can easily go for another design.
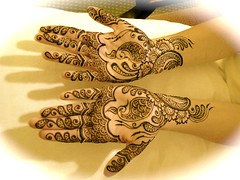
Popular Mehndi Patterns

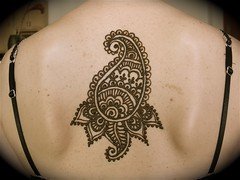
Though there are no set patterns or designs for Henna, there are some popular designs that have been followed since ages. One of the most popular designs is a paisley that is often filled with a checkerboard pattern. Another popular pattern is a lovely peacock, with the sharp and curved beak and the corona on the head. Floral patterns are quite popular as well.

Mehndi Art Pictures